Are you a React beginner? This React tutorial will explain everything in simple terms and plain English so you don’t feel overwhelmed or frustrated while learning React.
Is this React tutorial for you?
This guide is for beginner React developers who struggle to move forward while learning React.
It will give you a very simple “ABC” path that you can follow, step by step, concept by concept, without the overwhelming feeling that you need to learn everything at once.
Take your time, digest the content of each article in this series and try to complete the challenge.
My suggestion is that you only progress to the next step, when you are super clear about each of the concepts.
What you will learn
- what is a React
component - what is the difference between
statelessandclasscomponents - what is the
stateand what areprops - what is
destructuringin JavaScript - how to render React component on the page
Are you already familiar with React? Try the challenge at the end of the article.
Go to challenge Download React Cheat Sheet
Let’s go.
1. Think React, think components
This is the first and a major concept to understand, but it’s fairly straight forward.
Every React app is build out of components. You may have one single component in a simple app or a number of components in something more complex.
Simple React components
Simple React components:
- can just render a static (hardcoded) html markup
- can be dynamically rendered based on a locally saved JSON data
- can be nested into each other to create a more complex app layout
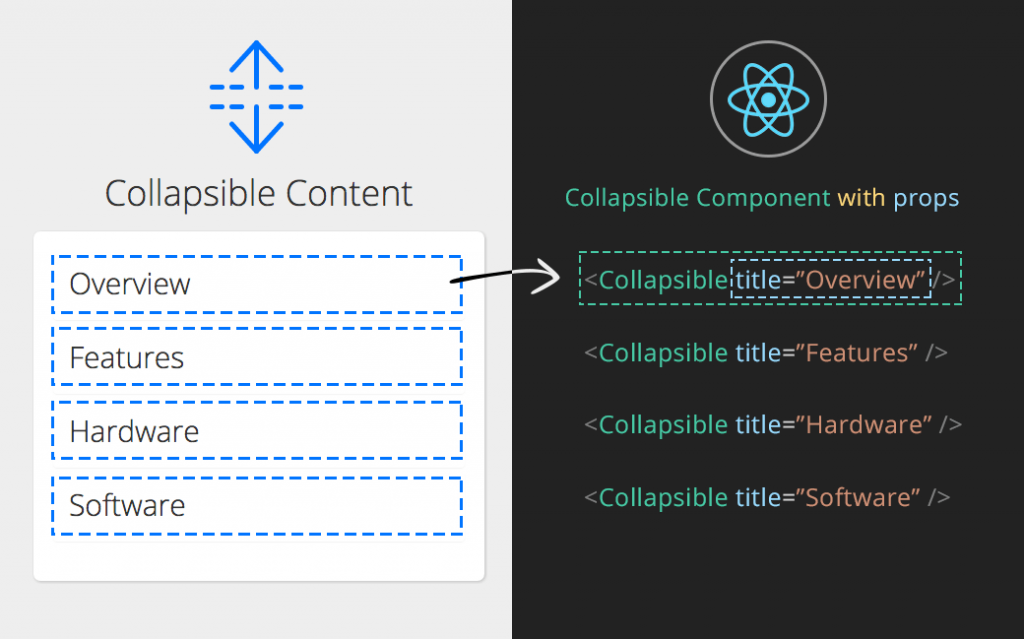
- can be rendered based on a data (aka
props) provided by a parent component (more on props later)
The simplest React component just renders a bit of HTML markup.
Complex React components
Given that this is a beginners guide I won’t go to much into details here.
A more complex React components might have more logic inside of them, but at the end of the day they are also just rendering a bit of HTML markup on the page.
Complex React components:
- can include advanced logic that defines what the returned html will look like
- can contain it’s own state (more on state later)
- can contain lifecycle methods (more on that later)
- can include custom methods that will be executed when a user clicks on a button for example
That’s all you need to know. Now we’ll have a look at the syntax of both simple and more complex React components.
2. React component syntax
If you are coming from a jQuery background like me, you might find it overwhelming to look at the React class components, so lets break it down a little bit.
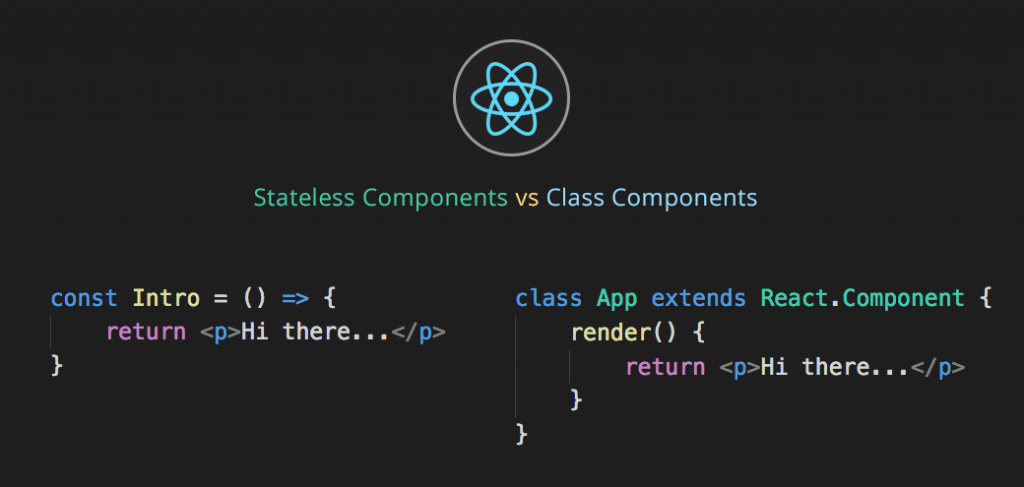
Simple (stateless) React components
// Simple (stateless) React component
const Headline = () => {
    return <h1>React Cheat Sheet</h1>
}
The simple React component is a function that returns HTML. In the above example H1 will be rendered on a page.
You can also return multiple lines of HTML like this:
// Component must only return ONE element (eg. DIV)
const Intro = () => {
    return <div>
        <Headline />
        <p>Welcome to the React world!</p>
    </div>
}

const Intro = () => {
    return (
        <div>
            <Headline />
            <p>Welcome to the React world!</p>
        </div>
    )
}

const Intro = () => (
    <div>
        <Headline />
        <p>Welcome to the React world!</p>
    </div>
)
See how we have included the parenthesis around the second example? (lines 10 and 15)
All three of these components would do the same thing, but including the parenthesis might help with readability of your components. Your choice.
The third example does not even include the return statement, but we had to change {} to ().
Why do we need the containing div around the HTML markup?
It is one of the requirements of JSX, each component can only return one element.
That is why you will need wrap all your HTML markup into one containing HTML element eg. div or ul.
JSX makes writing your html inside of React components more elegant.
I will refer to JSX as HTML for the rest of this guide.
Advanced React components (ES6 classes)
Below is an example of React Class Component, sometimes referred to as a smart component.
class App extends React.Component {
    render() {
        return (
            <h1>React Cheat Sheet</h1>
        )
    }
}
It does not make sense to use class for a simple component like that, you should use the stateless component instead.
Lets add a constructor, set current date as the local state of this component and then render it out inside of the H1.
class App extends React.Component {

    // fires before component is mounted
    constructor(props) {

        // makes this refer to this component
        super(props);

        // set local state
        this.state = {
            date: new Date()
        };

    }

    render() {
        return (
            <h1>
                It is {this.state.date.toLocaleTimeString()}.
            </h1>
        )
    }
}
Here we are Adding Local State to a Class.
Firstly we include the constructor with super() and then set the initial state of the App inside of the this.state JavaScript object.
We can now access the date from the state inside of the render method like this: {this.state.date}.
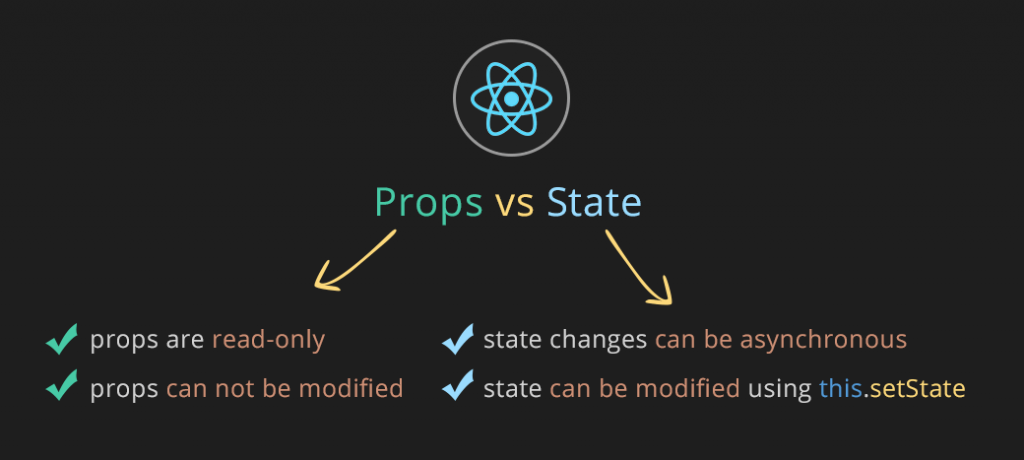
2 important things to know about the React component’s state:
- you can not modify the state directly, you will need to use
this.setState({data: new Date()})instead ofthis.state.date = new Date() - state changes might be assynchronous, you should not rely on the state values for calculating the next state
Your state might grow with your app and include as many properties as you need.
Now lets see what the difference is between state and props.
3. State vs Props
You can pass some of your state values down to the child components as props.
Here is an example of a component that receives props:
// Component that receives props
const Greetings = (props) => {
    return <p>You will love it {props.name}.</p>;
}
This component will render the prop name (Petr) if it was passed down from the parent component like this:
<Greetings name={Petr} />
We can then access this prop inside of the return statement as {props.name} or destructure the props right when we are creating this component like this:
const Greetings = ({name}) => {
    return <p>You will love it {name}.</p>
}
This will let us only use {name} inside of the return statement.
The main difference between props and state in React is that props are read-only and can not be modified from inside of component.
If we wanted to change the name rendered inside of Greetings component we would need to go the parent React component, modify the name and pass down the new value.
4. Destructuring
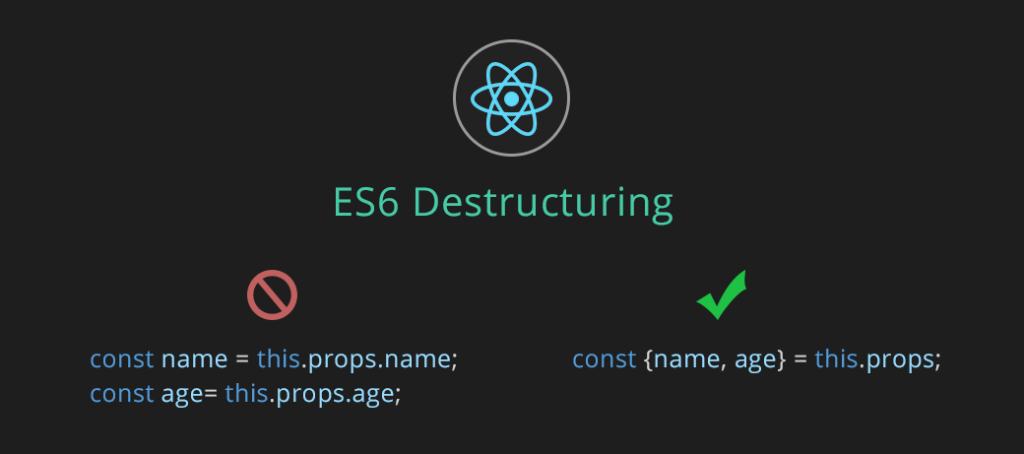
I mentioned the word destructure, it refers to the concept of ES6 destruring.
Instead of creating multiple variables (constants) like this:
const name = this.props.name;
const age = this.props.age;
const isLoggedIn = this.state.isLoggedIn;
const username = this.state.username;
Get used to destructuring like this:
const {name, age} = this.props;
const {isLoggedIn, username} = this.state;
It will save you some typing and make your code more compact.
Great new ES6 feature build into JavaScript.
5. Render component into the DOM
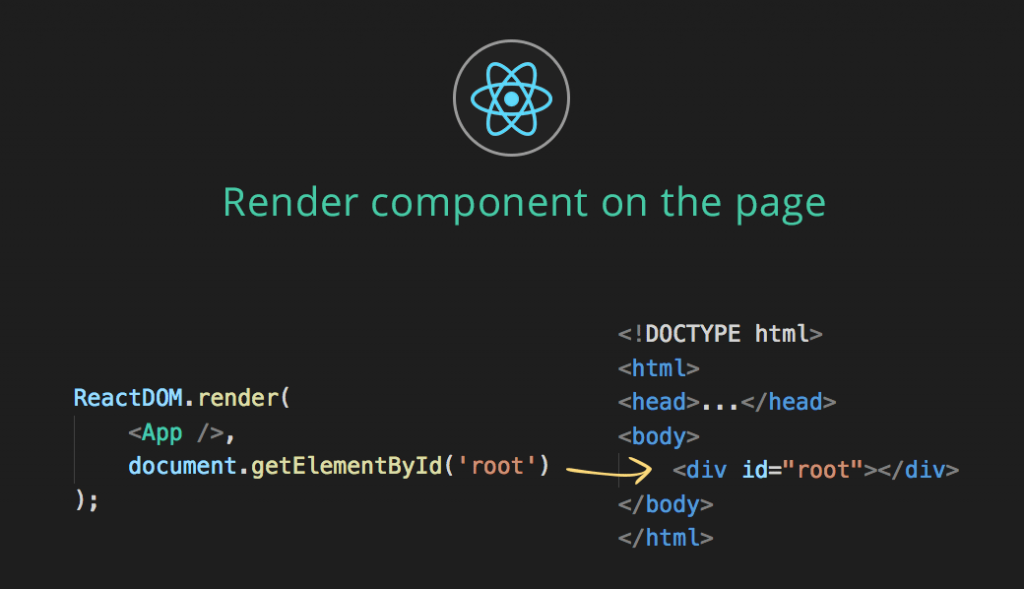
To be able to see your React component on the page you will need to use ReactDOM.render() and pass it an html element where you want your app to be mounted to.
// your-project-folder/src/index.js

// Import React and ReactDOM
import React from 'react'
import ReactDOM from 'react-dom';
import App from './js/components/App';

// Render component into the DOM - only once per app
ReactDOM.render(
    <App />,
    document.getElementById('root')
);
In the above example we are firstly importing React and ReactDOM
Then we are importing the App component from another file and mounting it to the page into the div#root element.
You will find this ReactDOM.render() method inside of every React app.
This code is inside of a file called “entry point” and mostly called index.js or similar.
Conclusion and your challenge
Now you are familiar with the basic React concepts such as components, state, props, destructuring and mounting.
Your challenge
Explore the following CodePen demo and see if you can answers some of these questions.
- Can you see the entry point and the related “mounting” code?
- How many React components are in this
app? - Which line of the code is using
destructuring? - Which of the two React components does not have to be a class component and why?
- Can you rewrite that component into a stateless component?
Give it a try.
4864
Have you found answering these questions much easier then before reading this article? Let me know in the comments.
We will keep exploring the other parts of React in the next article.
Do you want to learn even more about React?
- Take my free React online course and build 3 practical React components from scratch.


This tutorial is not for beginners at all.
Hi Diamond, sorry for the disappointment. Are you new to React or front-end in general?
Hi Petr, Thank you for the follow up and sorry for the rude comment but yes I am new to programming. My IQ is also very less. I am researching in which Framework to go. I didn’t liked the licensing policy of React. May be I would pick up Vue.
Hey Diamond, React has updated their license so it might still be a good choice for you.
its probably worth mentioning that before you attempt a React problem, you should learn at least the basics of JavaScript & HTML.
I am relatively new to coding (been learning for about 3months) and I found this tutorial highly valuable.
The focus on the fundamentals was exactly what I was looking for.
I’ve found this article to be a very nice and concise overview of React. Honestly, I don’t know how can it get any simpler. Thanks!
The only unclear part is the parameters here:
ReactDOM.render(
,
document.getElementById(‘root’)
);
I would just assume that it hooks the components rendering to an element with ‘root’ id. Although, purpose is a mystery, and React doesn’t seem to be rendering anything without it.
Yes Jerry, you need to use the ReactDOM.render method to be able to see your react component on a page. Thanks for checking out the tutorial.
A very good starting point for the React learning.
Thank you for this tutorial! You walk through and explain things just enough to get a understanding, but not overwhelm me. One of the better beginner React tutorials I’ve come across.
Thanks a lot! Anything else you would like to learn about React?
Best tutorial so far, clearer than the official one in my opinion.
Thanks for posting!
Thanks a lot!
Thanks a lot for the solid good intro
You are welcome.
Excellent,
Keep it up
Thank you!
I found this tutorial really helpful.
I have been programming JS and JQuery for years, and I always find it refreshing when someone creates a tutorial that is easy to digest and does not overload it with information that doesn’t apply to the subject matter. I also found the quick quiz at the end to be a good step for keeping what I just learned in my long term memory bank. 🙂
Thanks for taking the time to write this down.
It’s really great article for newbie like me. I am also a programmer and strong at js/jquery and some SPA framework like angular, vue.js. Recently I am extending my stacks with React.js, but I had some misunderstanding in terms of pros, state, stateless vs class components, etc. Btw I was able to have clear understanding in a few mins after reading this article. Very nice and detailed code snippet. Good blog for getting start into React terms.
very nice article!
Thanks Ares!
Thank you for a brilliant introduction tutorial which explains principles we would need to jump through hoops to understand elsewhere, in a nice digestible way. If everyone explained the way you do, it would make learning the web much easier and faster. Please post more.
Good job !!!
Please post more examples on react components as above examples not covering all which we want.
Thanks
Keep it up……
Nice Explanation
Very informative tutorial. Thanks
Thanks Ann!
Nice Article. It helps a lot .
Thanks