This Git tutorial will guide you through the most frequently used Git commands and help you feel more comfortable to manage your Git repository in the terminal.
Lets go.
Table of content
- Git clone
- Git status
- Git add
- Git commit
- Git push and pull
- Ignoring files
- Git log
- Amending changes
- Undoing changes
What is Git and why is it useful?
Git is a free and open source distributed version control system.
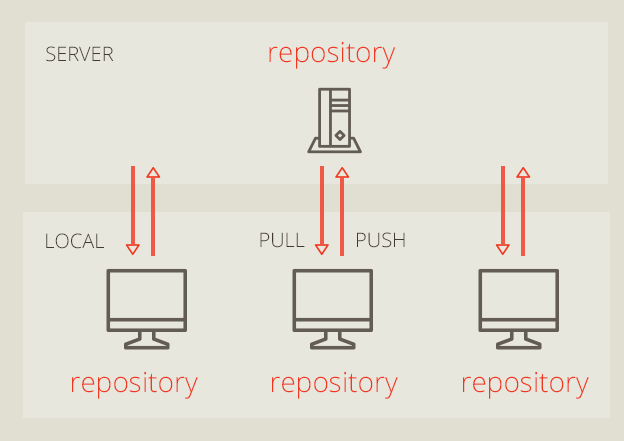
Distributed version control means that:
- it can be installed on your computer
- you can clone repository from a remote server
- you can make any changes to the code
- commit them locally, even on a plane without internet
- then push your changes to the remote repository
- others can pull your changes and collaborate
The opposite to distributed version control is centralized version control such as Subversion or SVN.
Git is easy to learn and has a very small footprint.
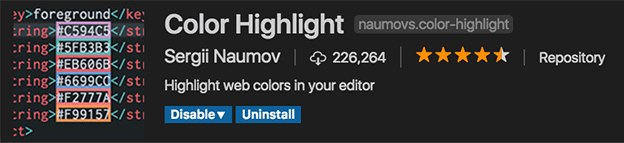
The best part about Git is its staging area, branching and out of the box integration in VSCode.
Clone, Status, Add
If you want to follow along with this article, you can clone any Git repository or even better you can create your own on GitHub.
Open your preferred terminal application and navigate to a folder where you want to clone the repo.
Make sure that Git is installed or download it here.
git --version
// output
git version 2.14.3 (Apple Git-98)
Git Clone
If the above shows a git version you are good to go.
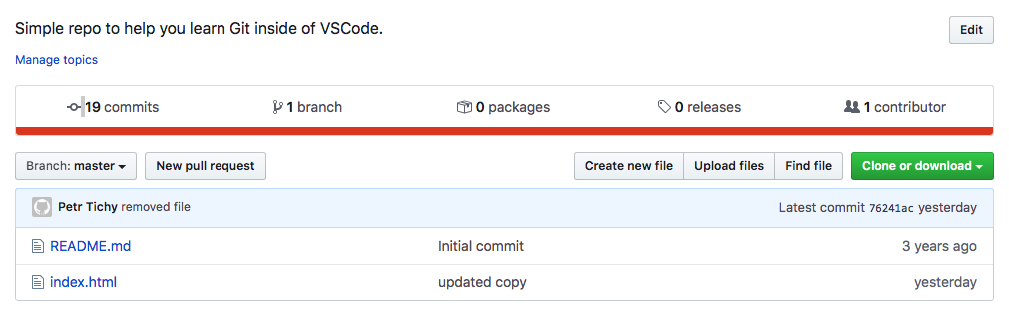
git clone https://github.com/Ihatetomatoes/vscode-git
The above command will create vscode-git folder and save a copy of the source code in that folder.
You can also clone and choose what the folder name should be by specifying it like this:
git clone https://github.com/Ihatetomatoes/vscode-git git-tutorial
Git clone will create a new folder git-tutorial instead of the default vscode-git
Now you can navigate to the cloned folder and open it in VSCode.
cd git-tutorial
code .
Easy, now we have a local copy of the code and can start making some changes.
Git Status
Lets make any change to any of the files and look at the status.
git status
This will print out the current status, in other words it will show you what has changed since you have cloned the repo.
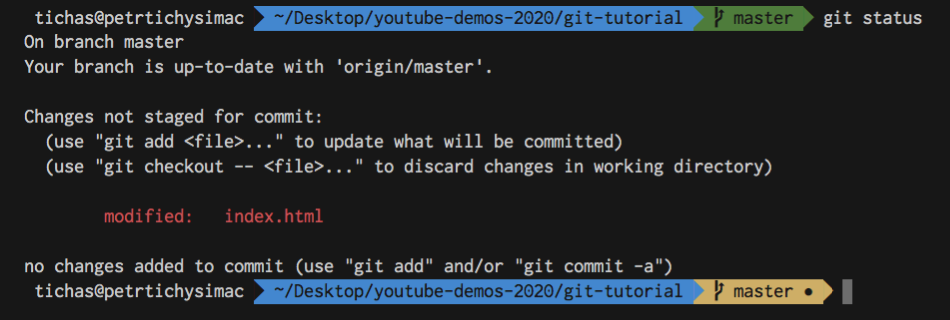
I have made one change to the text in index.html, that is why this file is now marked as modified.
Try to delete a file and look a the status again.

The deleted files are marked as deleted.
Lets try to add a new text file text.txt and check the status.
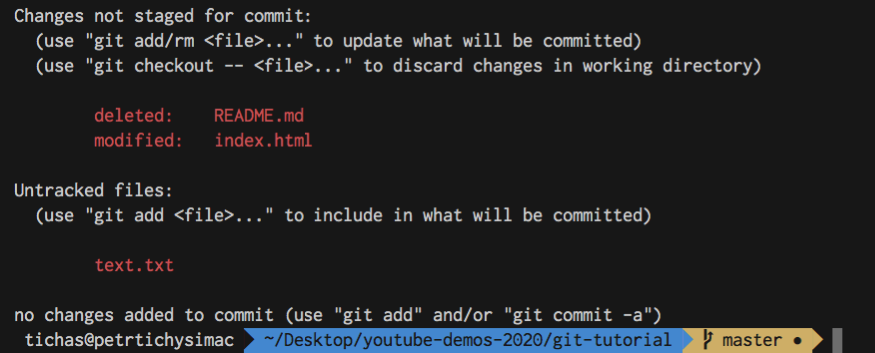
The deleted and modified files are tracked files because the remote repository already knows about them.
The new file is untracked, because it is completely new.
Git Add
To make sure that others can pull our new file, we need to add it first.
git add text.txt
Git add will add the file and its content to our Git repository and the status would look something like this.
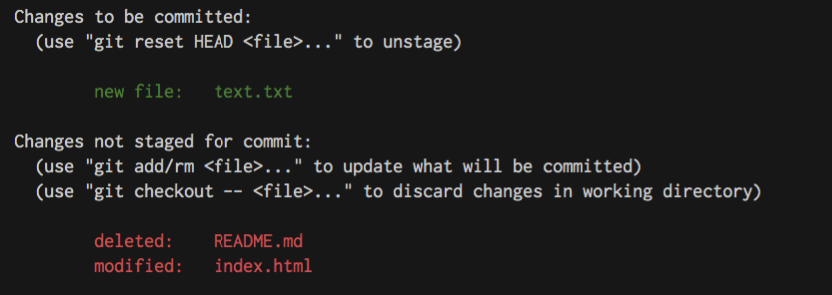
The newly created file is now added and ready for commit, but the other two changes are still unstaged. Which means that if we would commit at this point, only the new file would be committed.
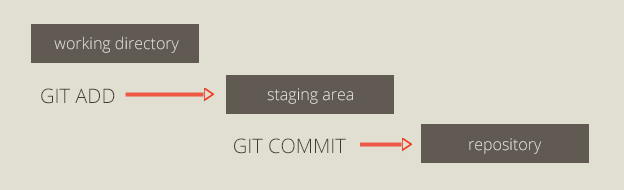
The stage is an in-between step before commit, but if you want to skip it and add all changes directly use:
git add --all
// or
git add -A
// or
git add .
This is a shortcut how to stage all new, modified or deleted files.

Now all files are staged and ready for commit.
Commit
Git commit is like a save button, it will take your current changes and save them together with a custom message.
With every commit we need to provide a simple message describing our changes.
This helps you to scan a history of commits later on, in case you need to revert back to a certain commit.
git commit -m "my changes"

New commit has been created with an id 4b8c593.
You can find this in the Git history log and check out this version of you project in the future.
Push and pull
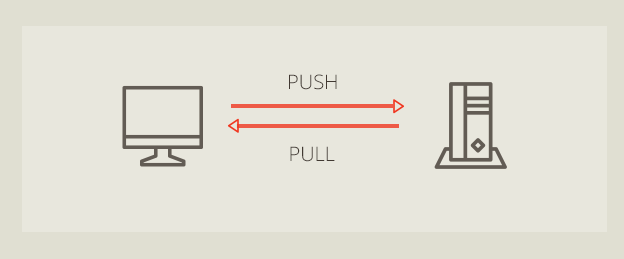
Until now all your changes are only stored locally, nobody will know what you have changed until you push your changes to the remote repository.
git push
Git push will push your local changes (commits) to the server and will let others to pull them to their computer.
git pull
Git pull will pull all new changes from the server. It lets you get the latest version of the project.
Ignoring files with .gitignore
On some projects you might want to exclude some files or folders from Git and only keep them locally.
Example of that could be your VSCode workspace settings folder.
If you change some workspace settings (I have changed autoSave to afterDelay), you will see a new folder .vscode created in the root folder of your project.
To exclude this folder from being included with your changes and tracked by Git, you need to create .gitignore file in the root of your project.

Above is .gitignore created but without the .vscode folder, below we are excluding this folder from Git tracking.
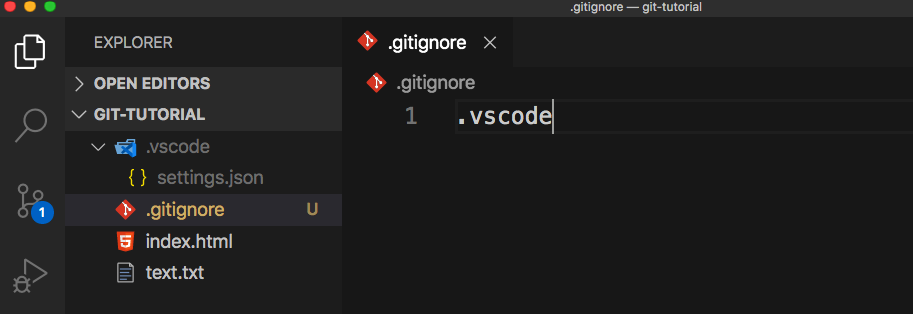
When we include .vscode in .gitignore, VSCode recognizes that. It does not show is as untracked and all changes to this folder will be ignored by Git.
This file can include a single file or a path to multiple files or folders. Refer to the gitignore documentation for all the potential patterns.
Log
Git log lets you see a history of all commits made to this repository.
It includes your local commits and also all commits made by someone else before you have cloned it.
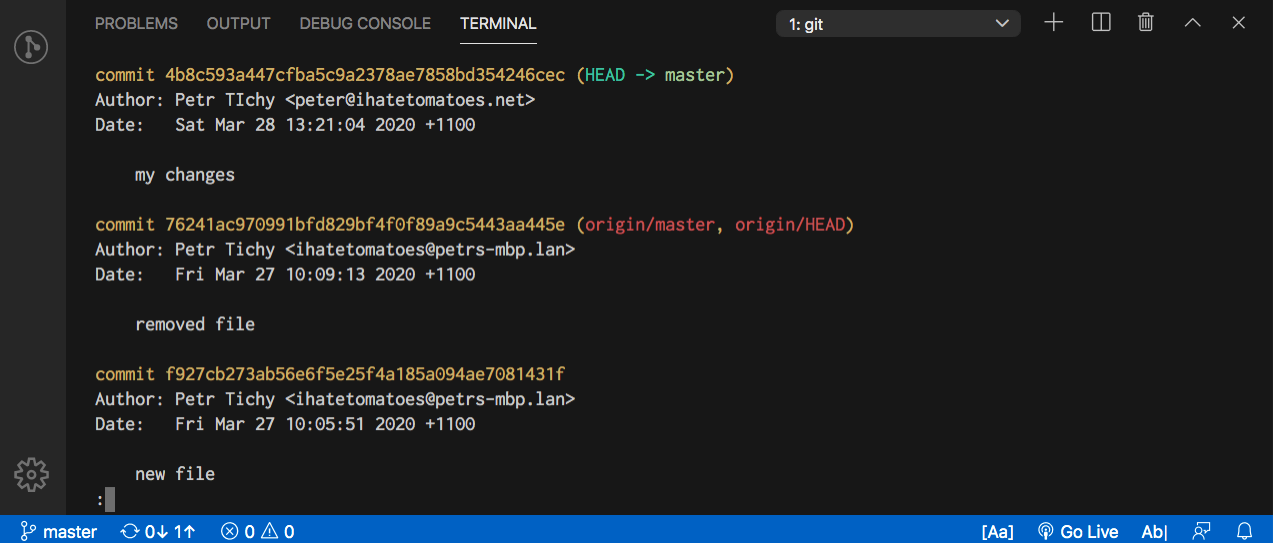
The green commit is our local one, the rest of the commits are from the past on the remote.
VSCode also shows the number of local commits in the bottom left corner near the arrow up (push).
If we run git status at this stage we would see that we are 1 commit ahead of master.

You can modify the output of the Git log by specifying some options.
git log --stat
git log --pretty=oneline
git log --pretty=format:"%an, %ar, %s"
git log --pretty=format:"%h %s" --graph
These Git log commands with different options would give you different format of the same log.

Refer to all the Git Log options for more.
To exit Git log, type in :q, :z or press Ctrl + z depending on your platform and OS.
Amending changes
Sometimes you might have a scenario when you do a commit but you forgot something.
You could create another commit with the new change, but you could also amend the change to a previous commit.
git commit --amend
git commit --amend would commit your change into your previous changes and everything will show as one commit.
It would be like the previous commit never happened.
Undoing your changes
There are a few options when it comes to reverting your local changes.
git reset index.html
Git reset would unstage your changes to index.html.
git checkout index.html
Git checkout reverts this file to what it was when you cloned the repo initially.
git reset --soft HEAD~
Git soft reset reverts your last commit but it would keep your staged changes.
git reset --hard
Git hard reset reverts all your staged changes.
git reset --hard origin/master
This would reset everything including your local commits.
Use reset --hard with caution, this action is irreversible.
If we use the last command we should have everything reverted and could start working on our feature again.
Conclusion
We have covered a lot. Now you know how to:
- clone a Git repo,
- add, delete and modify files,
- create local commit
- check Git status
- see the Git log
- undo changes in Git repository
I hope that this article was useful and all the Git commands are now less scary than before.
What do you like or don’t like about Git version control.
And what would like to learn next? Branching, merging conflicts or anything else?
Let me know in the comments.