Git reset can be quite overwhelming and scary.
If you don’t know what you are doing, things can go horribly wrong and you can lose some of your work.
In this Git reset tutorial you will learn how to undo your changes in all practical scenarios that I could think off.
Table of content
Are you new to Git? Checkout Git tutorial for beginners and Git branches tutorial.
How to unstage changes in Git
Your Scenario:
You are working on your local branch and you have staged 2 files using the git add . command.

How do you now unstage one of the files?
The Answer:
git reset readme.me
git reset readme.me would reset only the specified file and move it to the unstaged changes.

What if you wanted to unstage all changes currently staged?
git reset HEAD
git reset HEAD would move all your staged changes to unstaged.

In other words it moves the HEAD pointer to the last commit, resets the staged area and keeps your changes.
What if you wanted to reset and at the same time also wanted to get rid of your changes?
git reset --hard HEAD
git reset --hard HEAD would reset HEAD to the last commit and trash all your changes. The image below shows that the readme.md file has been deleted after the hard reset.

How to revert file to a specific commit
Your Scenario:
You are working on your local branch and you have already created a few commits but you want to revert file to a specific commit.
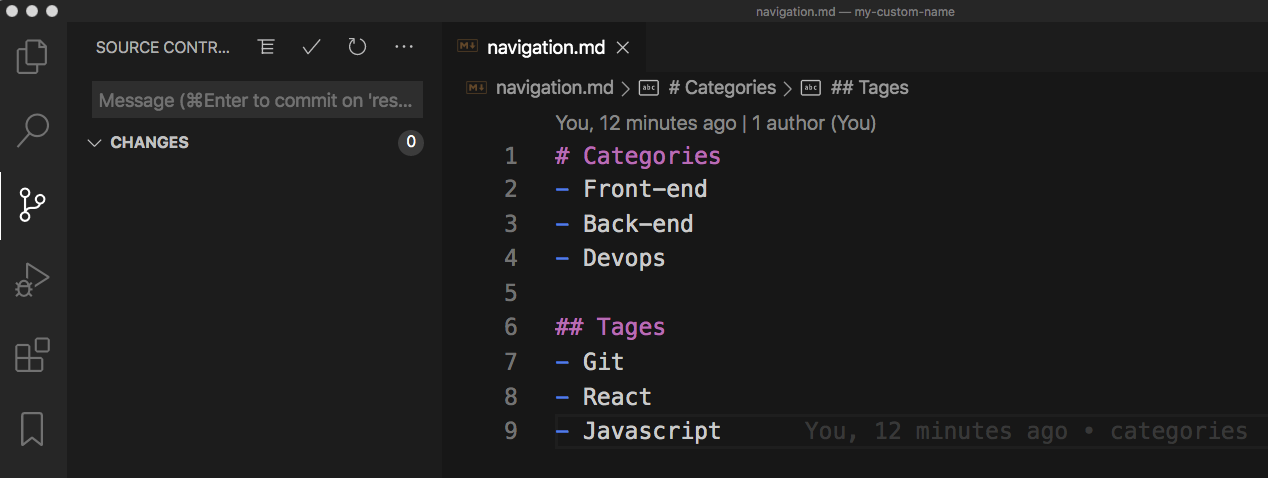
Firstly you need to find out the hash ID of the commit, run the git log --pretty=oneline command.
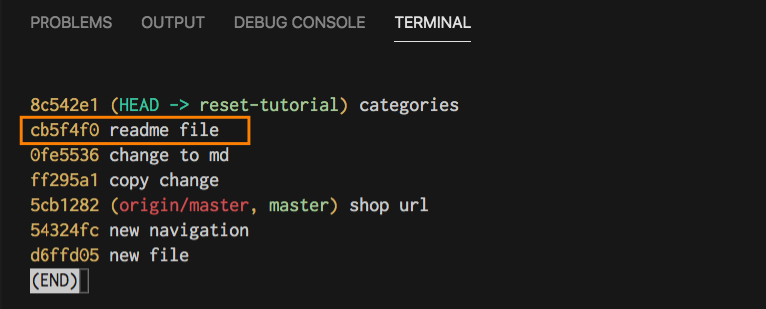
Pick a commit that contains the desired version of your file.
If you are not sure which commits contains the changes you are after, use the git diff command.
git checkout cb5f4f0 navigation.md
git checkout cb5f4f0 navigation.md would checkout this file and place it in your staged area.
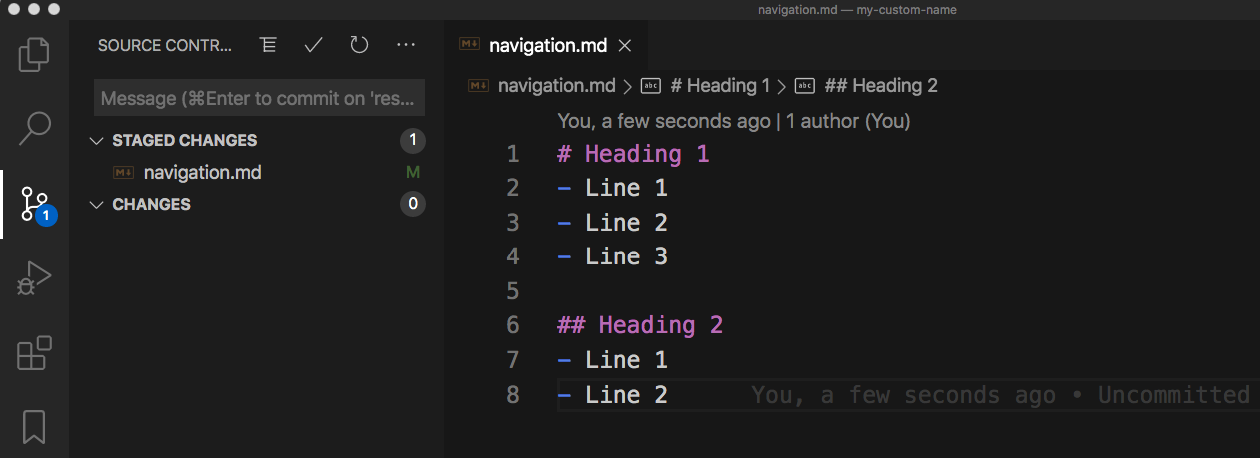
What if you only want to get a specific changes from this file?
You can choose what to bring back by adding -p and patch your working directory.
git checkout cb5f4f0 navigation.md -p
More on that in the next section.
How to manually edit Git changes
Your Scenario:
You need to revert changes in one of your files, but you want to choose which lines of code to bring back.
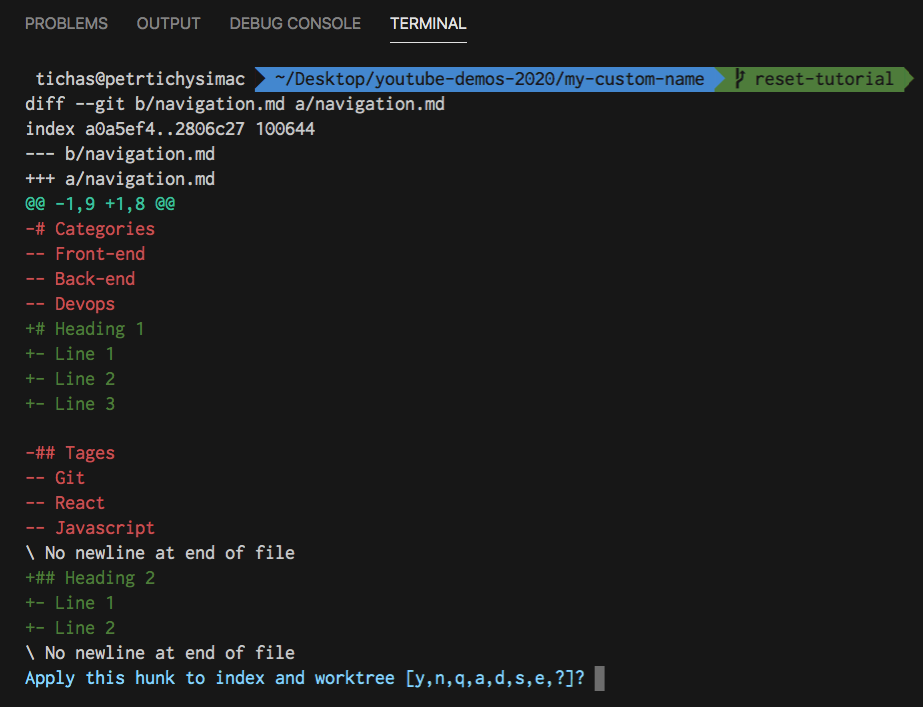
You get a few options when you specify the -p flag:
y yes, bring these changesn no, don’t bring changesq quit and don’t bring any changes. It’s like no but for all files.a stage this change and all other changesd do not stage this change or any other changes in the files split the current change into smallere edit manually the current change
s will split a bigger change into smaller ones, this makes it easier to edit.
e will enter a manual mode, where you can choose which lines to bring and which ones not.
To enter the editing mode you need to press i for insert, now you are able to navigate through the changes.
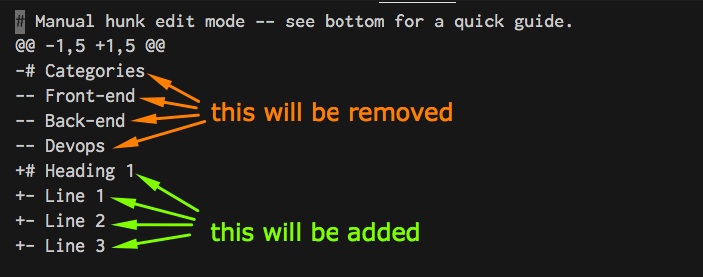
The lines marked with minus - at the start would be removed if we bring this change into our current version of the file.
To ignore removing these lines, simply delete - and replace it with an empty space .
The lines marked with plus + will be added to our current version of the file.
To prevent these lines from being included in the change, we can remove them and they will be ignored .
Here are the changes edited. We want to keep the Categories and 3 bullet points and only bring in Line 1, Line 2 and Line 3.
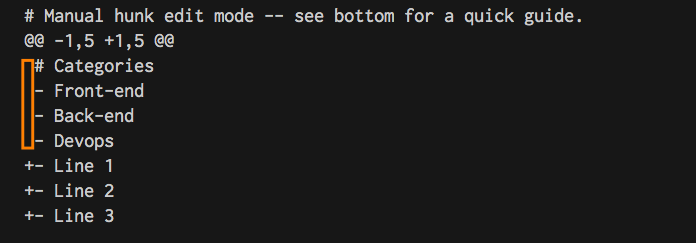
Adding Heading 1 back to our file will be ignored, because we have manually deleted this line.
To quit the edit mode press Esc and type in :wq and hit enter. w for write, q for quit.
To quit without editing type :q + enter.
Below is the file patched with the recovered code from our previous commit.

Have you enjoyed this Git tutorial? You might also like
Conclusion
If you have enjoyed this article you might also like Git tutorial for beginners and Git branches tutorial.
What is the most confusing Git feature that you would like to see explained in my future tutorials?
Let me know in the comments below.


