Git branches are one of the best features of Git version control and this tutorial will show you how to manage them.
Git branching model is incredibly lightweight, cheap and fast, regardless of how large your project is.
Git also encourages creating a new feature branches and merging them back to the default branch often.
In this tutorial we will learn:
- what is Git branch
- how to use branches in your development workflow
- how to create, checkout, rename and delete Git branch
- how to push branch to remote server
- how to merge Git branch
- how to quickly switch between branches
Are you new to Git? Checkout out the Git tutorial for beginners first.
What is Git branch?

Git branch is a pointer called HEAD that points to a snapshot of your changes.
Git init creates the first initial default branch on every projects and calls it the master.
Nobody bothers changing it, that is why you see almost all projects having one master branch.
All other newly created branches are usually referred to as feature branches.
Where does Git branch fit in your development workflow?

Imagine that your team is working on an existing web based application.
The team decides which new features they want to implement – new navigation and fix the login form.
They will create tasks in Jira or similar project tracking software.
2 developers could start working on both tasks directly in master, but committing changes could make the master unstable and merging conflicts with other developers would be a nightmare.
Much easier approach would be to create two branches, one for each task.
// feature branch for new navigation
features/[TASK-ID]-new-navigation

// bug fix for the login form
bugfixes/[TASK-ID]-login-form
This links the branch to a specific task Id that your team is trying to implement.
It also lets multiple developers to work on a different tasks independently without making the master branch unstable.
When the task is completed, a new pull request (PR) is raised, tested and reviewed by other developers before merging the branch into master. More on PRs later.
To protect the code in master even more, you can set the number of required PR approvals that suits your team and the project size.
This is a very common workflow on all Git based projects.
How to create Git branch?
To create a branch is simple.
git branch features/abc-123-new-navigation
This will only create the Git branch but it will not switch to it, you will still be on master. Run git log --oneline to see.
To use our new branch we need to check it out.
git checkout features/abc-123-new-navigation
Now we have switched to our feature branch and we could start working on the new navigation task.
We could use a shortcut to do both create and checkout in one command.
git checkout -b features/abc-123-new-navigation
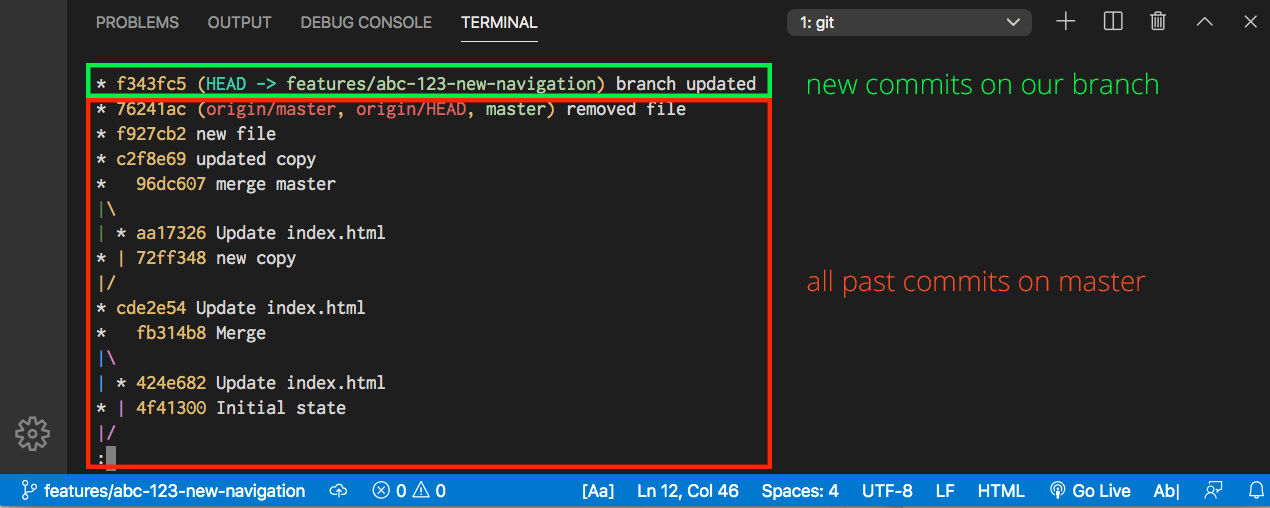
Git log now shows that the HEAD pointer is pointing to our new branch.
If you are using VSCode you would also see the branch name in the bottom left too.
After making a new commit on our new branch the log would look something like this:
All new commits will be created on our branch.
To switch quickly to the last branch you were on use:
git checkout -
This is a very handy command to quickly switch between master and your feature branch.
Local branch vs remote branch
Above we have created a new feature branch, but all our changes are only saved in our local repository.
If we needed any help from other developers we would need to push our brach to the remote repo for them to checkout.
git push origin features/abc-123-new-navigation
We have now pushed our branch and it will be available for others to checkout.
origin is the default name of the remote repository destination created automatically by Git.
How to merge Git branches?

I will explain how to merge directly from branch to branch without the need of PR approvals.
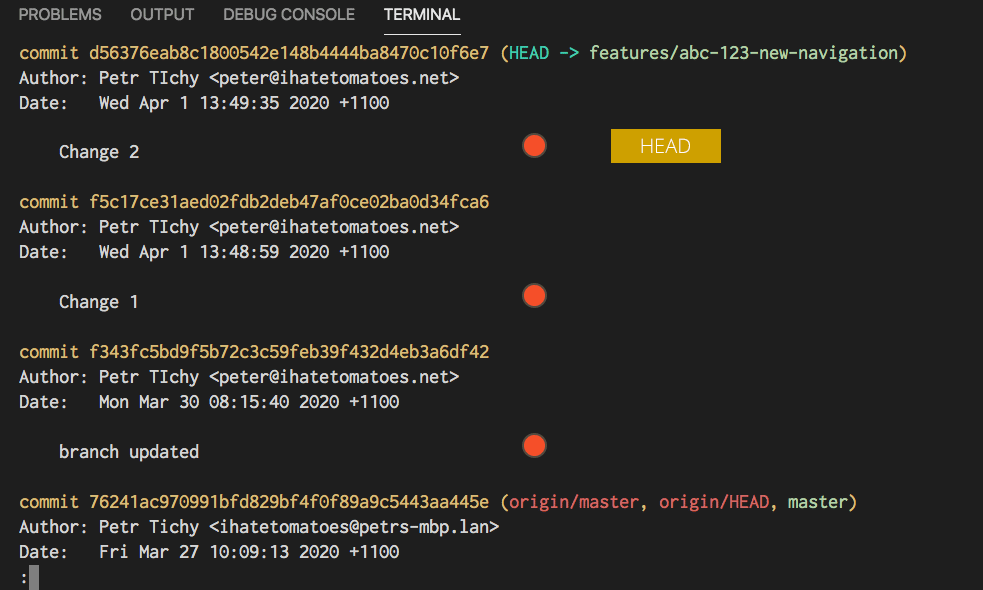
Above is a history with git log that shows 3 commits on our feature branch.
Firstly checkout the branch you want to merge into.
git checkout master
It switches your working directory to master.
Then we can merge our feature branch into master like this:
git merge features/abc-123-new-navigation
If there are no conflicts, master branch would now contain all your changes and commits made on your feature branch.
If there are some conflicts, you can learn how to resolve them here.
You can delete unused branch manually.
git branch -d features/abc-123-new-navigation
Some platforms such as Bitbucket let you automatically delete a branch after you successfully merge your pull request.
Here is an example how to delete a branch on the server.
git push origin --delete features/abc-123-new-navigation
Managing Git branches
We have created, merged and deleted a branch, but what if we want to see a list of all branches?
git branch

// output
* master
features/abc-123-new-navigation
Git branch command will list all your available branches and the * highlights the currently checked out branch.
To see the last commit on each branch use this command:
git branch -v

// output
* master                        76241ac removed file
features/abc-123-new-navigation 5e943bb Change 1
To filter the list of branches based on whether they were already merged or not:
git branches --no-merged
git branches --merged
What if we wanted to rename a brach? There is a command for that too 🙂
git branch -m OLD-NAME NEW-NAME
// or
git branch --move OLD-NAME NEW-NAME
Git fetch vs Git pull
What is the difference between pull and fetch?
Git fetch will fetch all changes on the server that you currently don’t have.
It will check the server and send you information about new commits and branches. It will not modify your working directory.
Git pull however will fetch the changes and also merge them to your current working directory.
It will do git-fetch and git-merge in one single command.
Conclusion
Git branches are very handy concept and can definitely speed up your web development workflow a lot.
Now you know how to manage your Git branches.
Do you use Git branches on your projects? Do you have some handy tips that you would like to share with us?
Let me know in the comments.


